Guide for How to Sign Code with Microsoft Authenticode
A Code Signing Certificate can be used to digitally sign code or content developed by Windows Programs. After you received the trusted certificate and saved the PFX (.p12) file, follow the instructions below to guide you through the signing process on a Windows Vista machine running version Windows SDK 6.0 or lower. If you’re running version Windows SDK 7.0 or higher, reference our Microsoft SignTool Installation Instructions.
1. Run the SDK command prompt
To open the Microsoft Digital Signing Wizard, run the SDK command prompt. This requires you to already have .NET Framework SDK installed.
2. Type signtool.exe signwizard
In the command prompt, type signtool.exe signwizard and click Enter
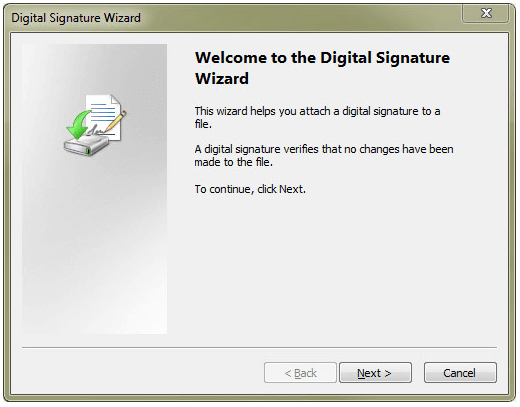
3. Click Next
Click Next in the Digital Signature Wizard window
4. Browse to your file
Browse to your file and click Next
5. Click Typical
For Signing Options, click Typical

6. Use Select from Store…
Use the Select from Store… button to browse to your certificate. Select your trusted Code Signing Certificate and click Next

7. Enter a description
Enter a description or web location
8. Select “Next” twice
Select Next twice, through Timestamping and then Finish
Congratulations! Your project has successfully been signed.
If you did not use the timestamping feature, we highly recommend you read our article on the importance of timestamping any code to ensure your signature remains valid after certificate expiration.